TL;DR:
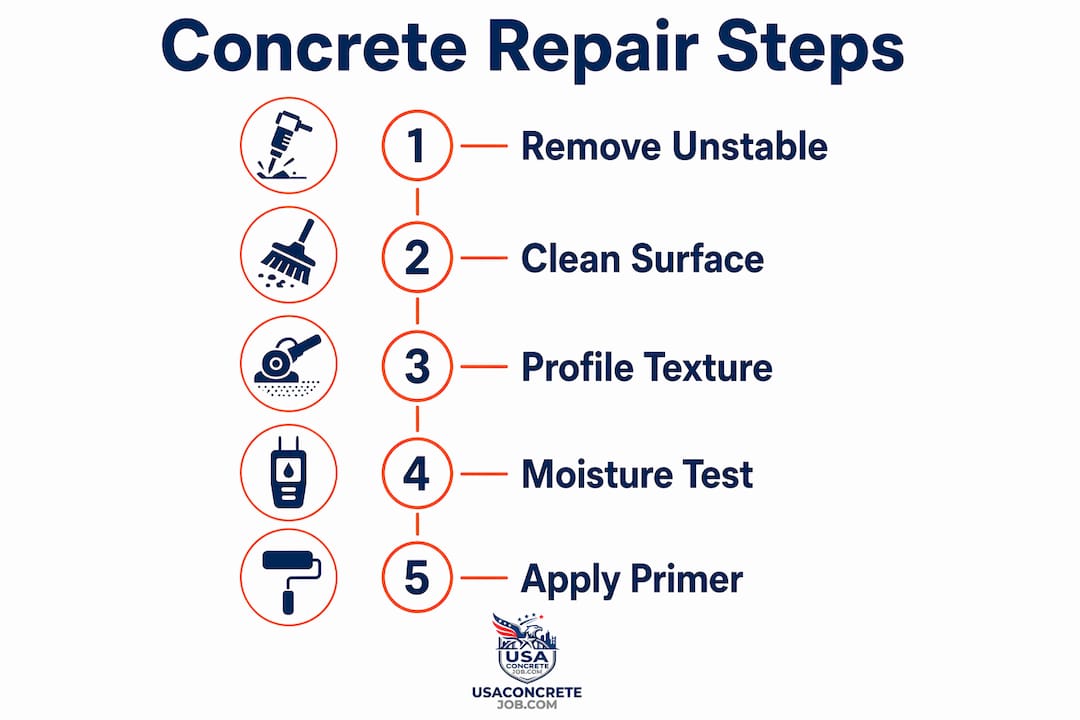
- Proper concrete repair relies on thorough surface preparation, including cleaning, profiling, moisture testing, and priming, to ensure long-lasting bonds. Skipping these steps often leads to rapid failure, especially when contaminants or moisture issues aren’t properly addressed. For large or complex repairs, hiring licensed professionals guarantees correct execution and durable results.
Concrete surface preparation is defined as the process of cleaning, profiling, conditioning, and priming a concrete substrate before applying any repair material. Skip this step, and even the best patching compound will fail within months. Proper surface preparation is the single most important factor influencing repair durability and bond strength. This guide walks you through every stage, from removing deteriorated concrete to applying a bonding agent, so your repair holds for years, not weeks.
What tools and materials do you need to prepare concrete for repair?
Getting the right equipment together before you start saves time and prevents mid-project mistakes. The tools you need depend on the size of the damaged area, but most homeowners working on driveways, patios, or garage floors will use a combination of the following.
Essential tools:
- Angle grinder with diamond cup wheel — ideal for small areas, spot grinding, and edge work
- Pressure washer (minimum 3,000 PSI) — removes loose debris, dirt, and surface contaminants
- Wire brush or stiff-bristle brush — for hand cleaning cracks and tight corners
- Cold chisel and hammer — for manual removal of small spalled sections
- Milling machine or scarifier — for larger surface areas requiring consistent profiling
- Wet/dry shop vacuum — clears dust and slurry after grinding or blasting
Materials you will need:
- Concrete degreaser or TSP (trisodium phosphate) cleaner
- Bonding primer or epoxy bonding agent
- Concrete repair mortar, epoxy filler, or polymer-modified overlay
- Plastic sheeting and tape for moisture testing
Safety gear is non-negotiable. Wear NIOSH-approved N95 or P100 respirators when grinding or blasting, impact-resistant safety glasses, cut-resistant gloves, and steel-toed boots. Concrete dust contains crystalline silica, which causes permanent lung damage with repeated exposure.
Pro Tip: For repairs under 10 square feet, an angle grinder handles surface profiling well. For anything larger, renting a walk-behind scarifier from Home Depot or Sunbelt Rentals cuts your labor time significantly and produces a more consistent surface texture.
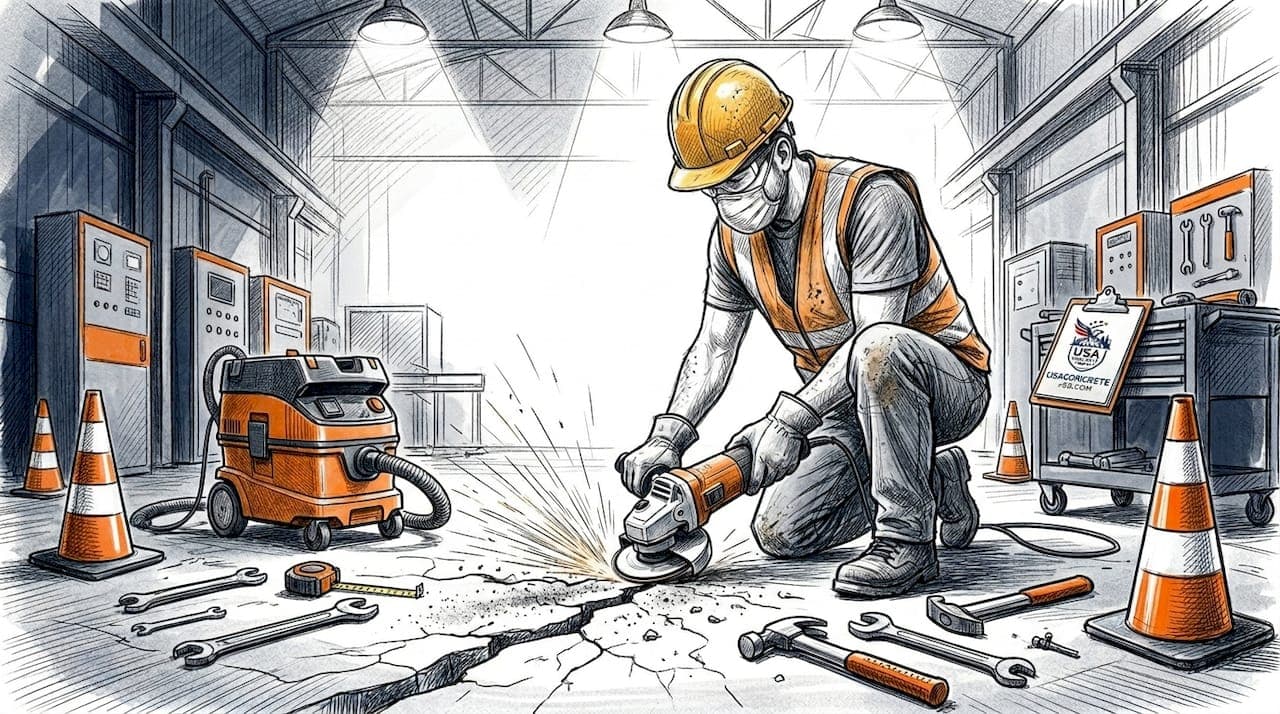
How do you remove damaged and deteriorated concrete safely?
Removing unsound concrete without damaging the solid substrate beneath it is the most technically demanding part of the preparation process. The goal is to cut away everything that is cracked, delaminated, or hollow, while leaving the sound concrete intact for bonding.
Start by tapping the surface with a steel rod or hammer. A hollow sound indicates delamination. Mark all hollow areas with chalk before you begin removal. This prevents you from guessing mid-project and accidentally removing sound material.
Comparing removal methods
| Method | Best for | Bond risk | Notes |
|---|---|---|---|
| Jackhammering | Large, deep demolition | High micro-fracture risk | Can damage sound substrate below |
| Cold chiseling | Small spalls, hand work | Low if controlled | Slow but precise for tight areas |
| Milling / scarifying | Medium to large surface areas | Very low | Leaves textured surface ideal for bonding |
| Angle grinding | Edges, small patches | Low | Best for feathering edges and spot work |
Milling removes damaged concrete leaving a textured surface ideal for bonding, while jackhammering can damage the substrate. This distinction matters because micro-fractures from jackhammers extend into the sound concrete below, creating invisible weak points that cause premature bond failure. Milling machines reduce labor and produce textured surfaces without those fractures.
When using a cold chisel or grinder, work at a 45-degree angle toward the center of the damaged area. Never feather the edges of the repair area to a thin taper. Repair edges should be saw-cut square or undercut slightly to create a mechanical lock for the patch material.
Pro Tip: Saw-cut the perimeter of your repair area to a minimum depth of 1/4 inch before removing material. This clean edge prevents the patch from cracking at the boundary and gives the repair a professional finish.
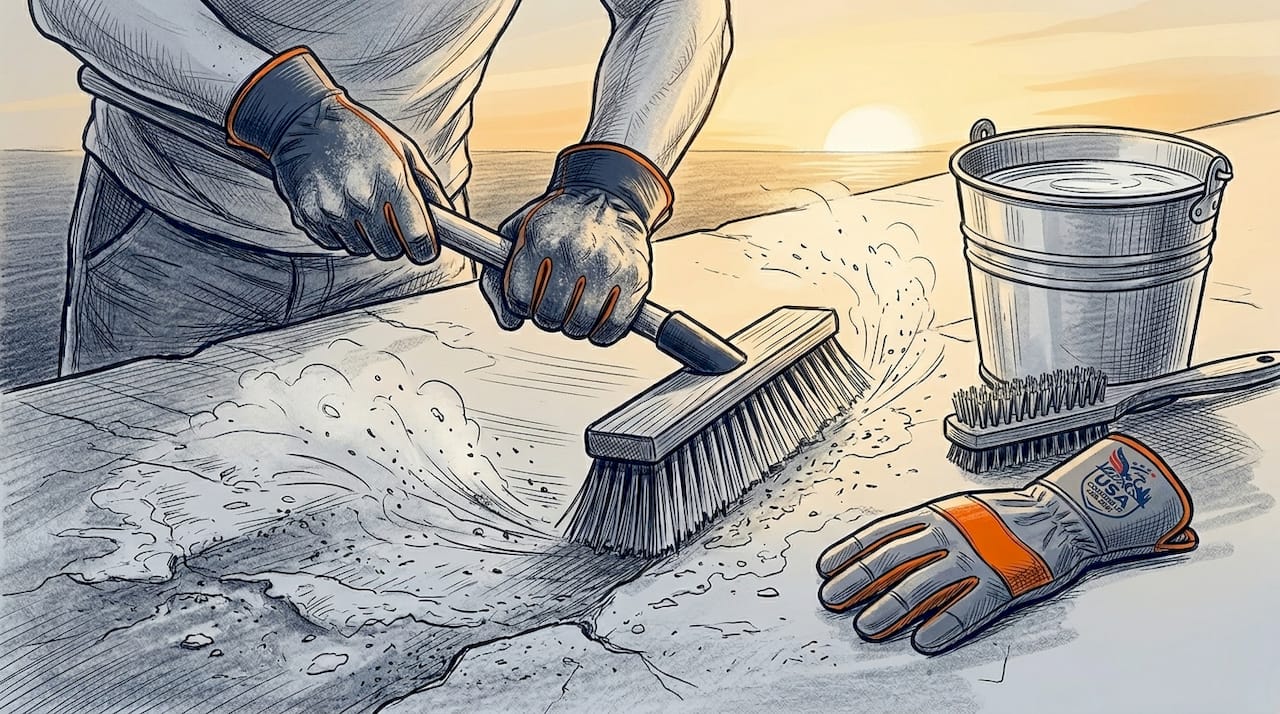
How do you clean and profile the surface for optimal adhesion?
Once damaged material is removed, the surface must be cleaned and profiled before any repair product goes down. Oils, curing compounds, laitance, and dust all act as bond breakers. Abrasive blasting and grinding open pores and remove contaminants critical to adhesion.
The industry standard for measuring surface texture is the Concrete Surface Profile (CSP) scale, developed by the International Concrete Repair Institute (ICRI). CSP runs from 1 (nearly smooth) to 10 (very rough). Most repair overlays and epoxy systems require a specific CSP range to bond correctly.
CSP requirements by repair type
| Repair system | Required CSP | Recommended method |
|---|---|---|
| Thin epoxy coatings (under 10 mils) | CSP 1–2 | Diamond grinding |
| Standard epoxy and polyurethane systems | CSP 3–4 | Shot blasting (S-330 to S-460) |
| Polymer-modified overlays | CSP 3–5 | Shot blasting or scarifying |
| Heavy overlays (over 1/4 inch) | CSP 4–5 | Scarifying or milling |
CSP levels 3 to 5 are typically required for effective adhesion of coatings and repair overlays. Selecting the correct CSP tailored to your repair material manufacturer's specs minimizes adhesion failures significantly. Always check the product data sheet for the repair mortar or overlay you plan to use. It will specify the required CSP range.
Cleaning checklist before repair:
- Degrease oil-contaminated areas with a concrete degreaser, then rinse thoroughly
- Remove curing compounds by grinding or shot blasting, not chemical strippers alone
- Vacuum all dust and debris after mechanical preparation
- Rinse with clean water and allow to dry to the correct moisture condition
- Confirm surface texture by pressing your hand on the concrete. It should feel like medium-grit sandpaper after proper profiling
For waterproofing applications, surface preparation for waterproofing follows the same CSP principles but places additional emphasis on eliminating any moisture pathways before coating application.
Why does moisture testing matter before you apply repair materials?
Moisture is the most overlooked variable in concrete repair, and it causes more failures than any other single factor. Many repair failures occur due to improper surface moisture levels, which is why accurate testing is not optional.
Epoxy systems are particularly sensitive. Apply an epoxy repair product to a surface with excessive moisture, and the water vapor pressure will push the coating off the substrate within days. Cementitious repair mortars are more forgiving but still require the surface to be in a specific moisture state for proper curing.
How to test surface moisture:
- Plastic sheet test (ASTM D4263): Tape a 24-inch square of plastic sheeting to the concrete and leave it for 16 to 24 hours. Condensation under the sheet indicates excessive moisture.
- Calcium chloride test (ASTM F1869): Place a sealed dish of calcium chloride on the surface for 60 to 72 hours, then weigh it. Results above 3 lbs per 1,000 square feet per 24 hours typically disqualify standard epoxy systems.
- Relative humidity probe (ASTM F2170): Insert a probe into a drilled hole at 40% of the slab depth. Readings above 75% to 80% RH signal a moisture problem for most resin-based systems.
Surface conditioning to Saturated Surface Dry (SSD) state prior to repair application ensures optimal moisture compatibility with cementitious or resin-based repair materials. SSD means the concrete pores are full of water but the surface itself has no standing water or sheen. For cementitious mortars, SSD is the target condition. For epoxy systems, the surface must be dry, not SSD.
Pro Tip: Mist the surface with water and watch how fast it absorbs. If water beads up, the surface still has contaminants. If it soaks in within 30 seconds, the surface is clean and open. This quick test takes 10 seconds and tells you more than most homeowners realize.
How do primers and bonding agents improve repair adhesion?
Primers and bonding agents create a chemical and mechanical connection between the existing concrete and the new repair material. Proper selection and application of primers help achieve a durable bond and extend repair life significantly.
Common primer types and their uses:
- Epoxy bonding agents: Best for resinous repair systems and high-strength structural patches. Apply in two coats and allow the first coat to tack before applying the second.
- Latex or acrylic bonding agents: Work well with cementitious repair mortars. Brush or roll onto the prepared surface and apply the mortar while the bonding agent is still tacky, not dry.
- Moisture-tolerant epoxy primers: Designed for surfaces that cannot be fully dried. These are specified under ASTM F3010 for moisture mitigation in epoxy systems.
- Penetrating silicate primers: Chemically react with the concrete to densify the surface. Used under thin coatings or as a standalone hardener, not under thick overlays.
Timing is critical with bonding agents. Apply the repair mortar or overlay while the primer is in the "open window," meaning still tacky. If the primer dries completely before you apply the repair material, it loses its bonding function and you will need to reapply. Check the product data sheet for the specific open time, which typically ranges from 30 minutes to 4 hours depending on temperature and humidity.
Never apply a bonding agent to a dusty or contaminated surface. The primer bonds to whatever is on top of the concrete, not the concrete itself. If the surface is not clean, the primer bonds to dust, and the whole system fails.
Key takeaways
Proper concrete surface preparation determines whether a repair lasts five years or five months, making cleaning, profiling, moisture control, and priming the four non-negotiable steps before any patch material is applied.
| Point | Details |
|---|---|
| Remove all unsound concrete | Use milling or cold chiseling to avoid micro-fractures that cause bond failure. |
| Match CSP to repair material | Check the product data sheet and achieve CSP 3–5 for most overlays and epoxy systems. |
| Test moisture before applying | Use the plastic sheet, calcium chloride, or RH probe method to confirm surface conditions. |
| Condition to SSD for mortars | Saturated Surface Dry state is the target for cementitious repairs; dry surface for epoxies. |
| Apply primer in the open window | Bond the repair material while the primer is still tacky, not after it has fully cured. |
What I've learned from watching homeowners skip the prep
Most concrete repair failures I've seen come down to one thing: impatience. A homeowner notices a crack or spall, buys a bag of repair mortar from a hardware store, and applies it directly to the old surface without any preparation. The patch looks fine for a few weeks. Then it pops off.
The part that surprises people is how little extra time proper prep actually takes. Cleaning and profiling a 20-square-foot repair area with an angle grinder and pressure washer takes maybe 90 minutes. Moisture testing adds another day of waiting. But that one day of patience is the difference between a repair that lasts a decade and one that fails before winter.
I also see homeowners underestimate the moisture issue more than any other variable. Concrete slabs on grade, especially in Texas, Florida, and Arizona, often have significant vapor drive from below. You can prepare the surface perfectly and still get bond failure if you skip the moisture test. For concrete repair projects in humid climates, moisture-tolerant epoxy primers are worth the extra cost every time.
My honest recommendation: if the damaged area is larger than 25 square feet, or if the damage goes deeper than 1 inch, call a licensed contractor. The prep work alone at that scale requires equipment most homeowners do not own and cannot easily rent. Getting it wrong costs more than getting professional help from the start.
— Jack
Get professional concrete repair help from licensed contractors

If your concrete surface repair project is larger than a few square feet, or if you are dealing with structural damage, moisture intrusion, or deep spalling, professional preparation and repair is the right call. USAConcreteJobs connects homeowners and property owners with licensed concrete contractors across Texas, Florida, California, Arizona, and Colorado. Every contractor in the network is insured and experienced in concrete cutting, waterproofing, and structural repair. You can request a free estimate directly through the site, with no obligation. Protect your investment by getting the prep and the repair done right the first time.
FAQ
What does it mean to prepare a concrete surface for repair?
Concrete surface preparation for repair means removing all deteriorated material, cleaning contaminants, profiling the surface to the correct texture, testing moisture, and applying a bonding agent before the repair material goes down. Each step directly affects how well the patch bonds and how long it lasts.
What CSP level do I need for a standard concrete patch?
Most standard repair mortars and epoxy systems require a Concrete Surface Profile of CSP 3 to 4, achieved by shot blasting with S-330 to S-460 steel shot or by scarifying. Always confirm the required CSP on the repair product's data sheet before starting.
Can I apply concrete repair mortar to a wet surface?
Cementitious repair mortars require the surface to be in a Saturated Surface Dry (SSD) condition, meaning pores are full but no standing water is present. Epoxy-based repair systems require a dry surface. Applying either product to a surface with standing water causes bond failure.
Why do concrete patches fail so quickly?
Most patch failures trace back to inadequate surface preparation, specifically skipping mechanical profiling, leaving contaminants on the surface, or applying repair material to a surface with incorrect moisture levels. Pull-off testing per ASTM C1583 can verify whether a repair bond meets the minimum strength threshold of 0.7 MPa before the area is put back into service.
When should I hire a professional instead of doing it myself?
Hire a licensed contractor when the repair area exceeds 25 square feet, when damage extends deeper than 1 inch, or when moisture testing reveals ongoing vapor drive from below the slab. USAConcreteJobs provides free estimates from vetted contractors in five states for exactly these situations.